Showing posts with label gifts. Show all posts


Driven by love for handmade cards I am presenting something every little girl will probably adore... I adore it, that's for sure :D

I am not a person who's following trends but somehow this magical looking mermaid shiny stuff wanted or not is constantly catching my eye for the past years and my brain just couldn't resist :)

So than here it is - a birthday Mermaid Card for my daughter!
The ideas was to recreate the mermaid's tale scales.
Reusing what we have is always my top priority in every project.
This time the main item was a paper scraps again which I always keep ;)
I choose different shades of blue, purple, lilac, pink 
and the shiny ones...whatever suits the mermaid theme in my head. 

To make this collection a bit more interesting I've made a quick addition.

I've fold a kitchen towels and dye them in a thin watery paint.
This way another textured paper was created, I was pleased with the results when the towels got dry.


Obviously I choose the colours which best remind me of a mermaid image.
But this is completely optional if you can't be arsed ;)


Let see what other materials 

      I use to create the card!
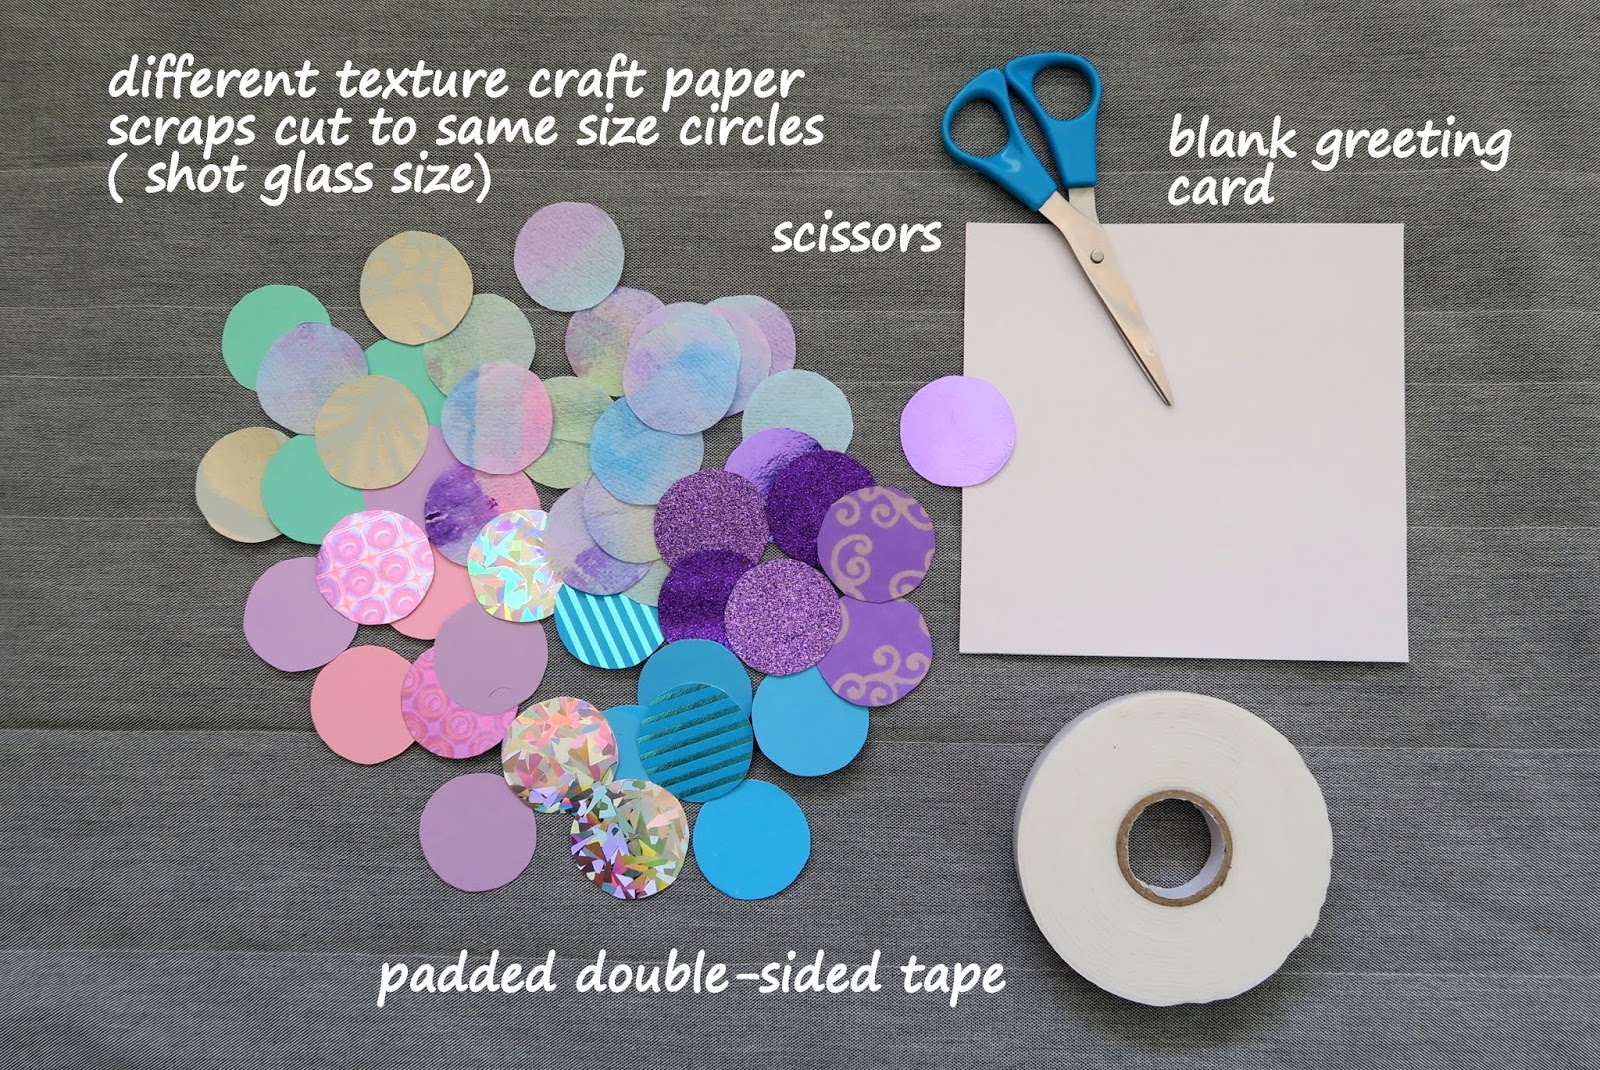


 Not much really isn't it!


Step 1.
Cut the circles out of you craft papers.
I use shot glass to draw them and cut out approx. 40 circles.
You can do it!


Step 2.


Using padded double-sided tape start to stick first row of scale circles.

Start from the side where the card is opening!


The next row will need to overlap the circle gaps so it looks like a scale.

Keep going!


Step 3.

When the whole card is covered turn it upside down to reviled the back of it.
This way it's going to be easier to trim 3 edges of the card.
Use the ruler and paper knife to cut off the scales.

Leave the opening edge as it is!


So it looks like this


Very often I make my own wrapping paper too, it was no different this time and again I matched the theme with a card :)


For the gift on the top I just use matching cotton threads and some gold string...


Second one is the large piece of tissue paper, folded and dyed in some thin paint again just like the kitchen towels.


Another two gifts and the one at the bottom was made by splashing some thin watery paint on the large white paper in a few different ways.


All was random and unpredicted , I didn't really planed what to do I just had fun with it :D


I've added a tiny bit of glitter too.


The balloon wrapping took a bit more effort.
I cut some circles out, stick different papers from underneath and drew details.
Only on one side of the gift.


I think it turned out pretty mermaid looking to me :)


Go on, have fun and make yours!


It's coming to an end of  school this month here in UK.
Like every year we made new THANK YOU cards for teacher and assistants to appreciate the work they do.
Today we're about to share my latest idea for such card using few different materials but easy at the same time.
There's part for kids and yourself to get arty ;)
So we created beautiful mixed media trees with the sign saying a classic "Thank you for helping me grow".

Lets have a look what did we use for this project!


For the leaves of the tree I decided to go crazy with the patterns yet keeping the green pallete.
I actually ordered some wallpaper samples.
I do that from time to time when need something extra special ;)
Wallpaper Direct have a huge range to choose from, two A4 samples are free then £0.50 each.
Absolutely worth it!


Some came with the texture too!


I also found some decorative papers at home and plain green card stock.


We also use :

- blank greeting cards
- tree bark 
- colored cotton thread 
- gold metallic pen
- black fine pen
- scissors
- PVA glue
- hot glue gun


 This project it's also a great occasion to get into nature again and talk about different kinds of trees and collect the bark from underneath. 


Step 1.

Cutting out leaves.
Many patterns, many sizes...


They're looking best with that crease in the middle ... 


and to get that effect simply fold paper then cut out your shapes.
I'm sure you knew that already :)


Step 2.
Cut out the base 
for a tree limb from a thick card using glass.
Ela was happy to hear it doesn't have to be too neat as the leaves will cover all.


Step 3.

Using PVA glue (kids option) or hot glue gun (adult option) attach the leaves starting from biggest, going round...


and round into the middle to cover the base.


Aren't they pretty?
We mixed in a dash of pink and purple ;)

Glue the leaves only on their bottom part so they stick out . 


Step 4.

Make the signs.
I cut out little rectangles out of a card and drew gold frames at the edges.


Ela then wrote " THANK YOU for helping me grow" on each.


Step 5.

I attached the leafy limbs onto cards using hot glue.


Step 6.

Attaching signs onto bark (tree trunk).

First I wrapped a cotton threads around...


I then cut both ends short and attached them onto sings with tape.

Remember to lay the sign upside down, it will be then turned over when attached ;)


Step 7.

I attached the trunks onto cards with hot glue gun, there's no other option in this case as the bark pieces are chunky and rough.


                We think they're gorgeous!


 To personalize this year teacher gift I make a simple printable you can also print it for FREE!
Get your child to finish the sentences and draw a picture :)


            Simpy click on the link below the image.


THANK YOU


I packed the gifts in simple brown paper bags and clipped the cards with wooden pegs.
We've made bath salts too, but that's some other time soon ;)


I'm looking forward to hear what do you think :) 

               Have a wonderful crafting
            and enjoy the Summer brake!