I planned to make and share many Halloween ideas this year.
Unfortunately my dear father has past away suddenly and the last days was nothing more then a big sadness to me.
Creativity and joy has gone somewhere inside the deep draw so few of the ideas have to wait until next year...
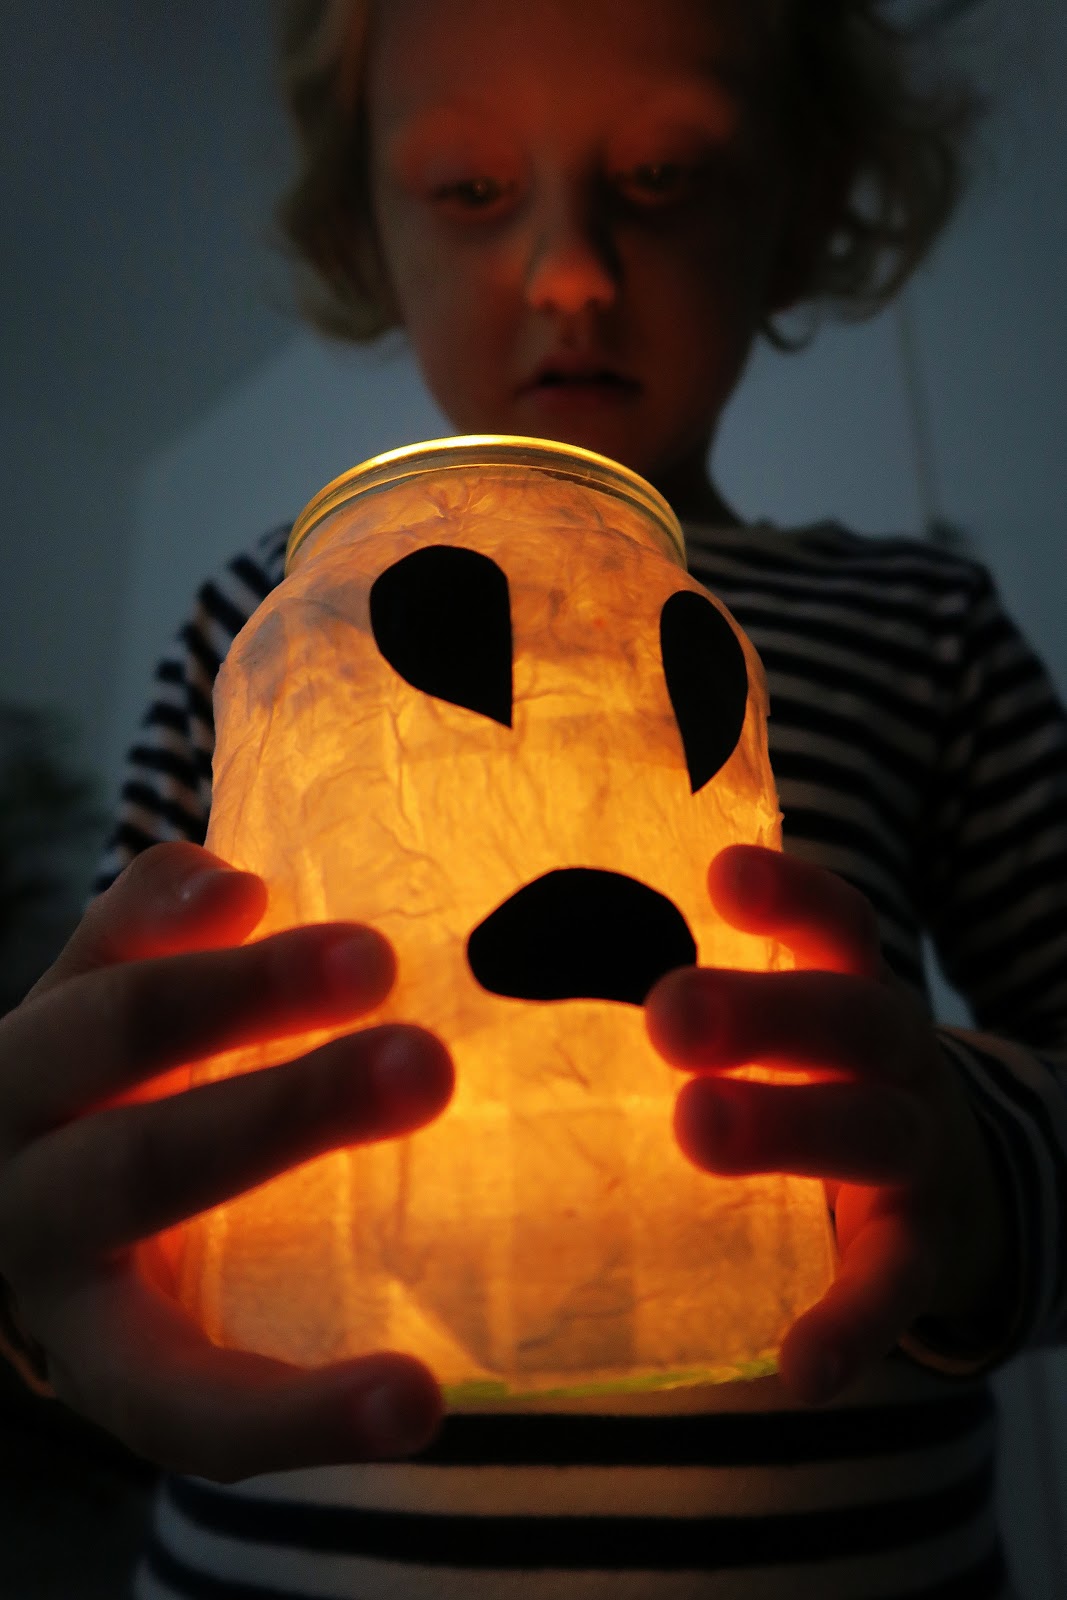
I needed to put my mind into a different place and decided to make one last Halloween craft with Ela.
This is something effortless and 100% suitable for little hands.
It can be also a last minute decoration as it's very quick to make.
Materials:
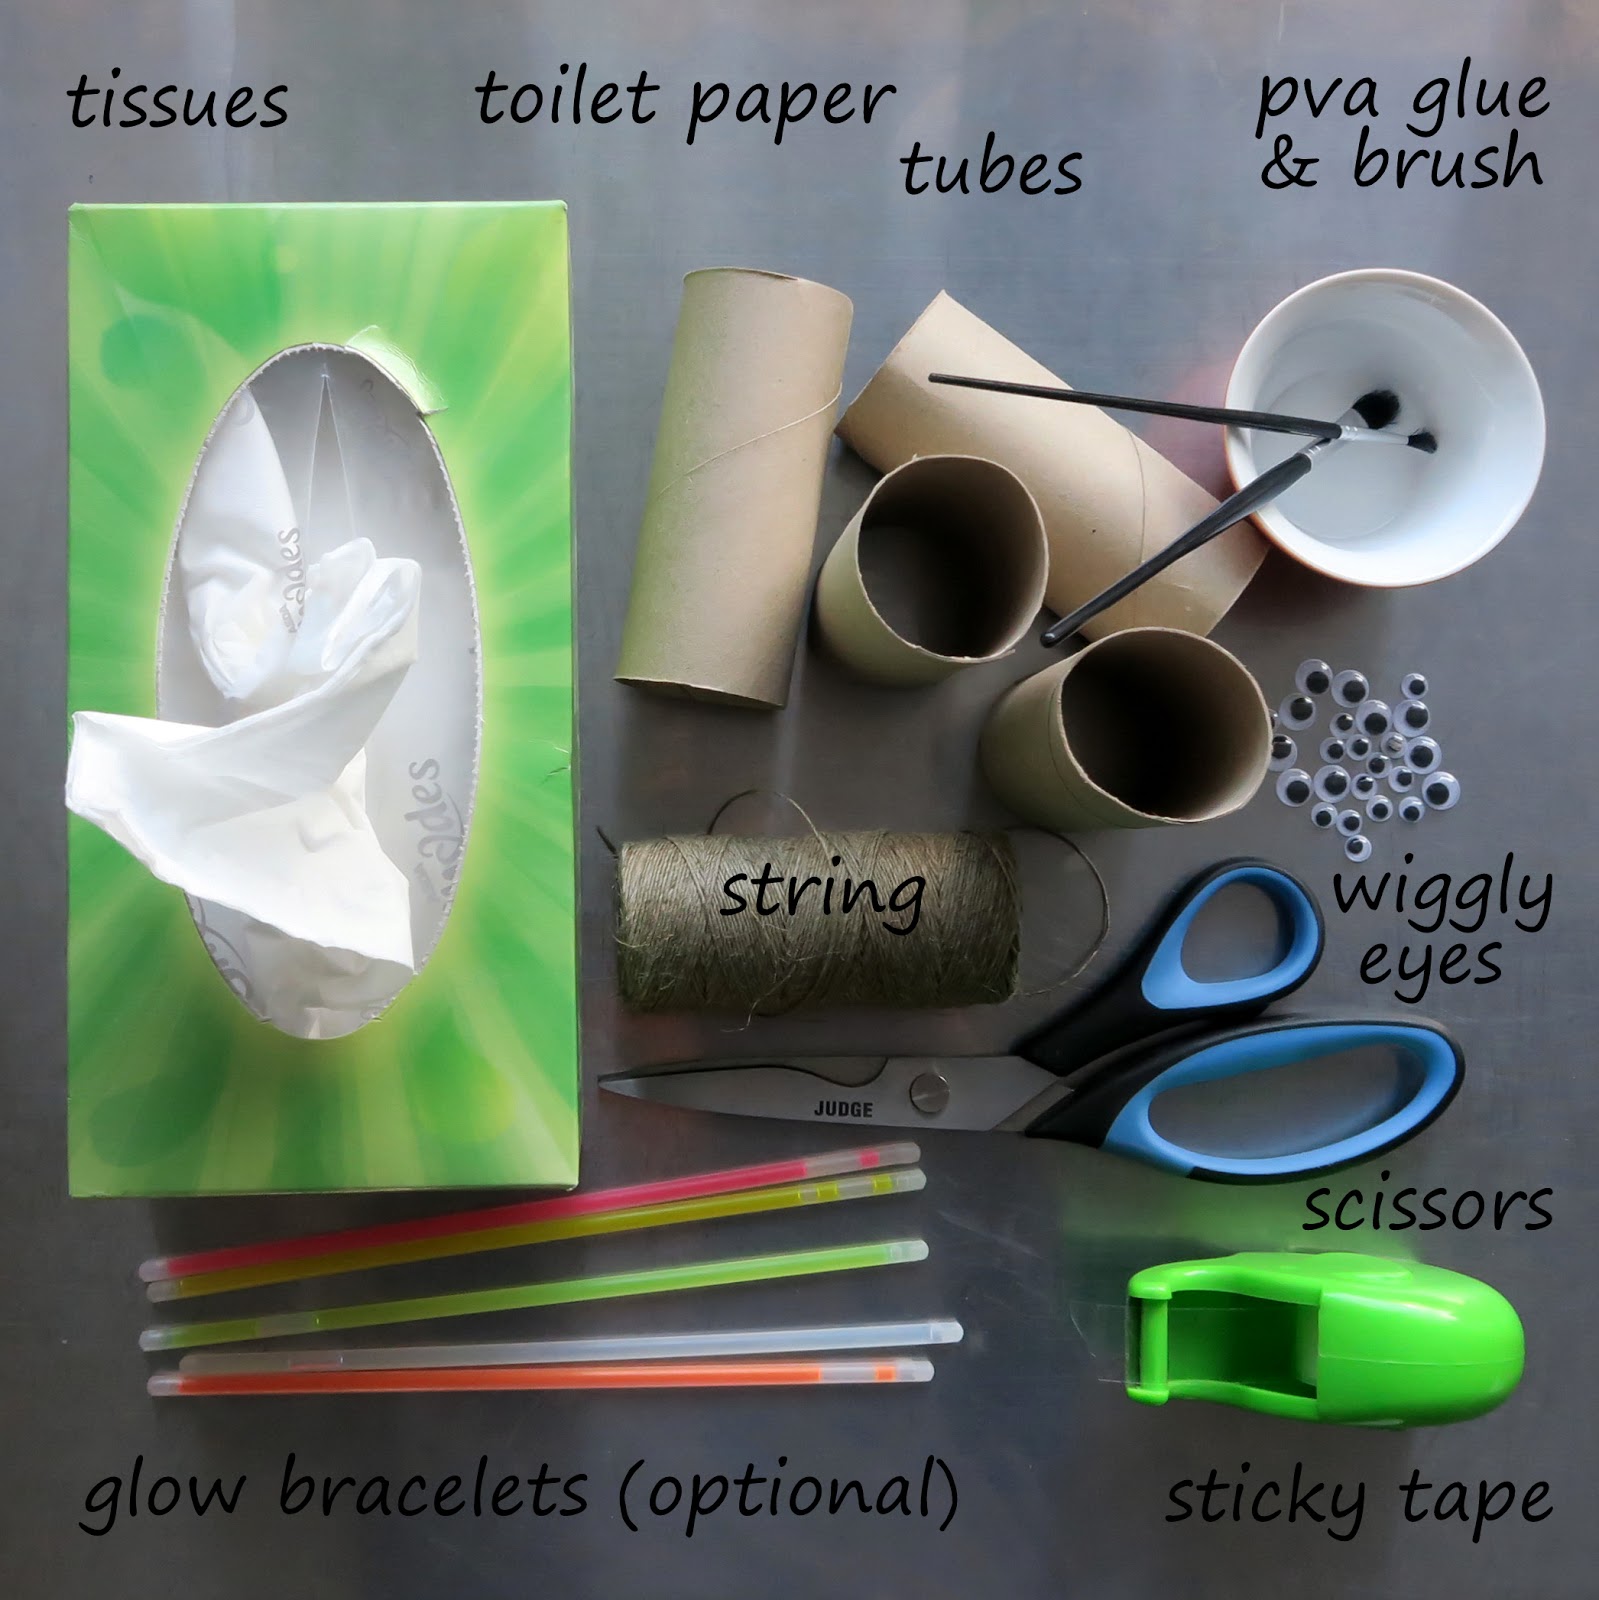
Step 1.
Cut tp tubes into halves.

Little lady, isn't she :)


Step 2.
Glue one inner edge of every tube generously and stick on three tissues around it so there is no tube visible.


Then flatten tissues by hand a bit.
Step 3.
Add some wiggly eyes.


Step 4.
Cut the pieces of string and stick it inside each tube using sticky tape.

Despite the photo I advise to use more then one piece of tape and stick the string deeper ;)
Step 5.Optional.
To make the ghosts glow in the dark insert some glowing bracelets inside the tubes.
Just make sure to use strong sticky tape for the strings.

You can now hang those ghosts anywhere you

I hung them from a busy shelf using heavy stuff to press down the strings.


You can use your ceiling lamp too.

They will look fun glowing in the dark of the Halloween night!


Enjoy your Halloween!