Hello in October!
In today's post I will show how I did my Autumn wreath using felt and a round picture frame.
I absolutely love working with felt, it's very versatile and comes in every colour you can imagine :)
For this project I also use Poundland frame, cheap and cheerful ;)
Wreath I made can be use in many ways too.

Lets have a look at the process of making!

First of all - frames and felt.

I made some simple quotes in Canva which I printed out.
You can use your own or print those out, just click on the links below images ;)

Autumn
hello Autumn
 I then cut a simple leaf shapes out of felt.


Next was inserting a quote into frame.


To make it more appealing I add simple lateral veins...


The next step was creating a stalks to add some dimension to my leaves using hot glue. 


After that I could get on with gluing leaves onto frame...


The idea was to cover that plastic frame...


...so I glued the leaves on outside, inside and top edge of the frame.


Meanwhile I notice I need to make more leaves :)


There you have it!


Yes, I change a quote in last minute :)


The glass part and image can be even removed...


and transform into table centre piece.


Colourful hanging decoration at the back is very easy to make too!
Have a look at instructions here ;)


Why not to  simply hang it on the wall.


                                      Lets celebrate the season!


We are officially in Autumn season, my favourite one.
Yes,it might rain more here in England but to me is still beautiful and spoiled with warm colours.

These colours I wanted to bring into our home, in today's post the living room.
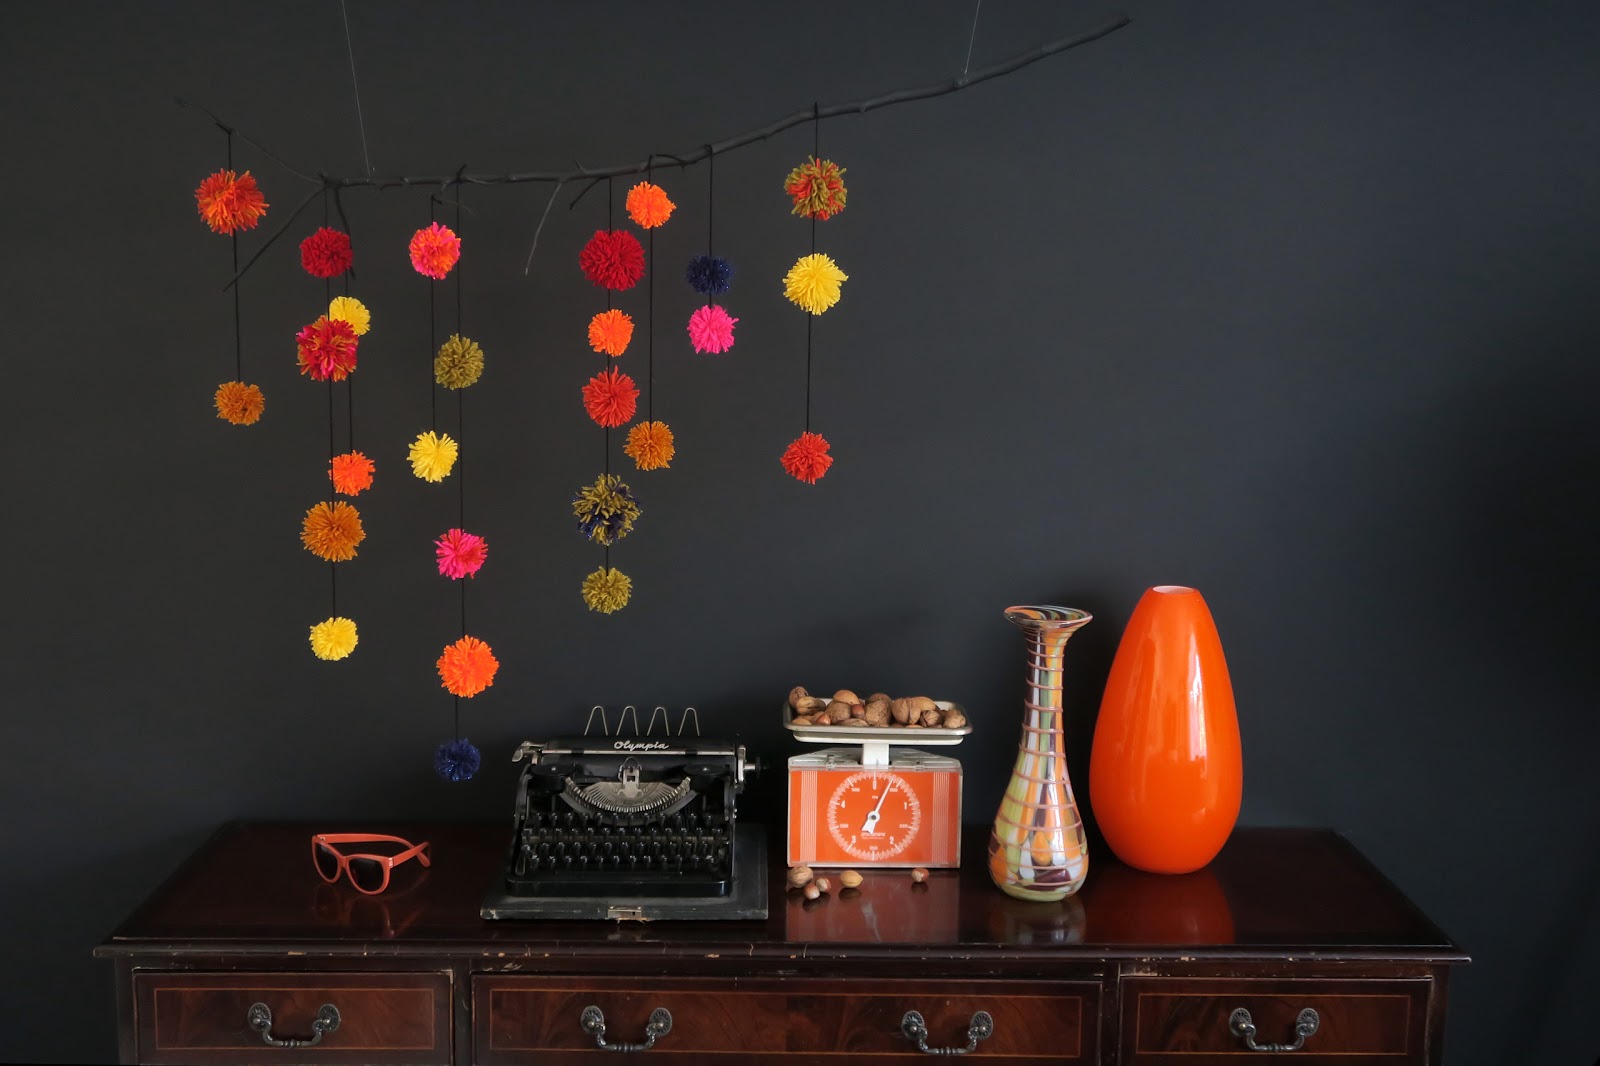
The branch full of vibrant pompoms  I made it's something I believe everyone can do.

To make this happen you will need:
1.fallen tree branch
2.yarn
3.self-adhesive hooks
4.strong fishing line


I firstly have gone out to found a fallen branch.


I then removed all dry leaves and little twigs.


Next I decided to painted in colour of my wall as I wanted the branch to look "invisible" ;)
I had some wall paint leftovers.


While the painted black branch was drying I picked the yarn for the pompoms.
Believe it or not I'm collecting yarn only for pompom making and other crafts...I can't knit...just yet ;)


These are the fall colours I choose.
Ela said "Blue in not an Autumn colour."
I wanted to mess the harmony up a little, beside I love that yarn with a little spark(Poundland)


Here's a reminder of how I make my pompoms using only fingers, two fingers for the a small one and three for a bigger one.
A single pompom will take approximately 5 minutes ;)


Multicoloured ones looking good too ;)


Here some of the first pompoms.
I made about 30 all together.
Just so you know it, I'm not that bothered about a messy look of my pompoms, I like them this way ;)


Next was to tread the pompoms on the long pieces of yarn using a large needle.
Hama beads were use for the end of the yarn to stop the last pompom from slipping down.


When I was done with nine pieces of pompom strings I hang the branch...

I stuck this type of hooks a while ago onto top of the shelf...

 to be able to hang and change my displays in many ways:)


To hang my branch I use strong fishing line.


Then goes the yarn strings with pompoms.


Looking nice when the sun comes through a window.

As I mention before I wanted "invisible" branch effect so the pompoms stand out on my black wall.
If the wall be white, the branch would be white too ;)


I love my piece of Autumn.
I hope you get inspired :)


I am now seriously hooked on making my own wrapping.
I found it extremely enjoyable, therapeutic, simply precious :)  
So to not get boring with cute pastel patterns which mothers of boys might find annoying by now :P...
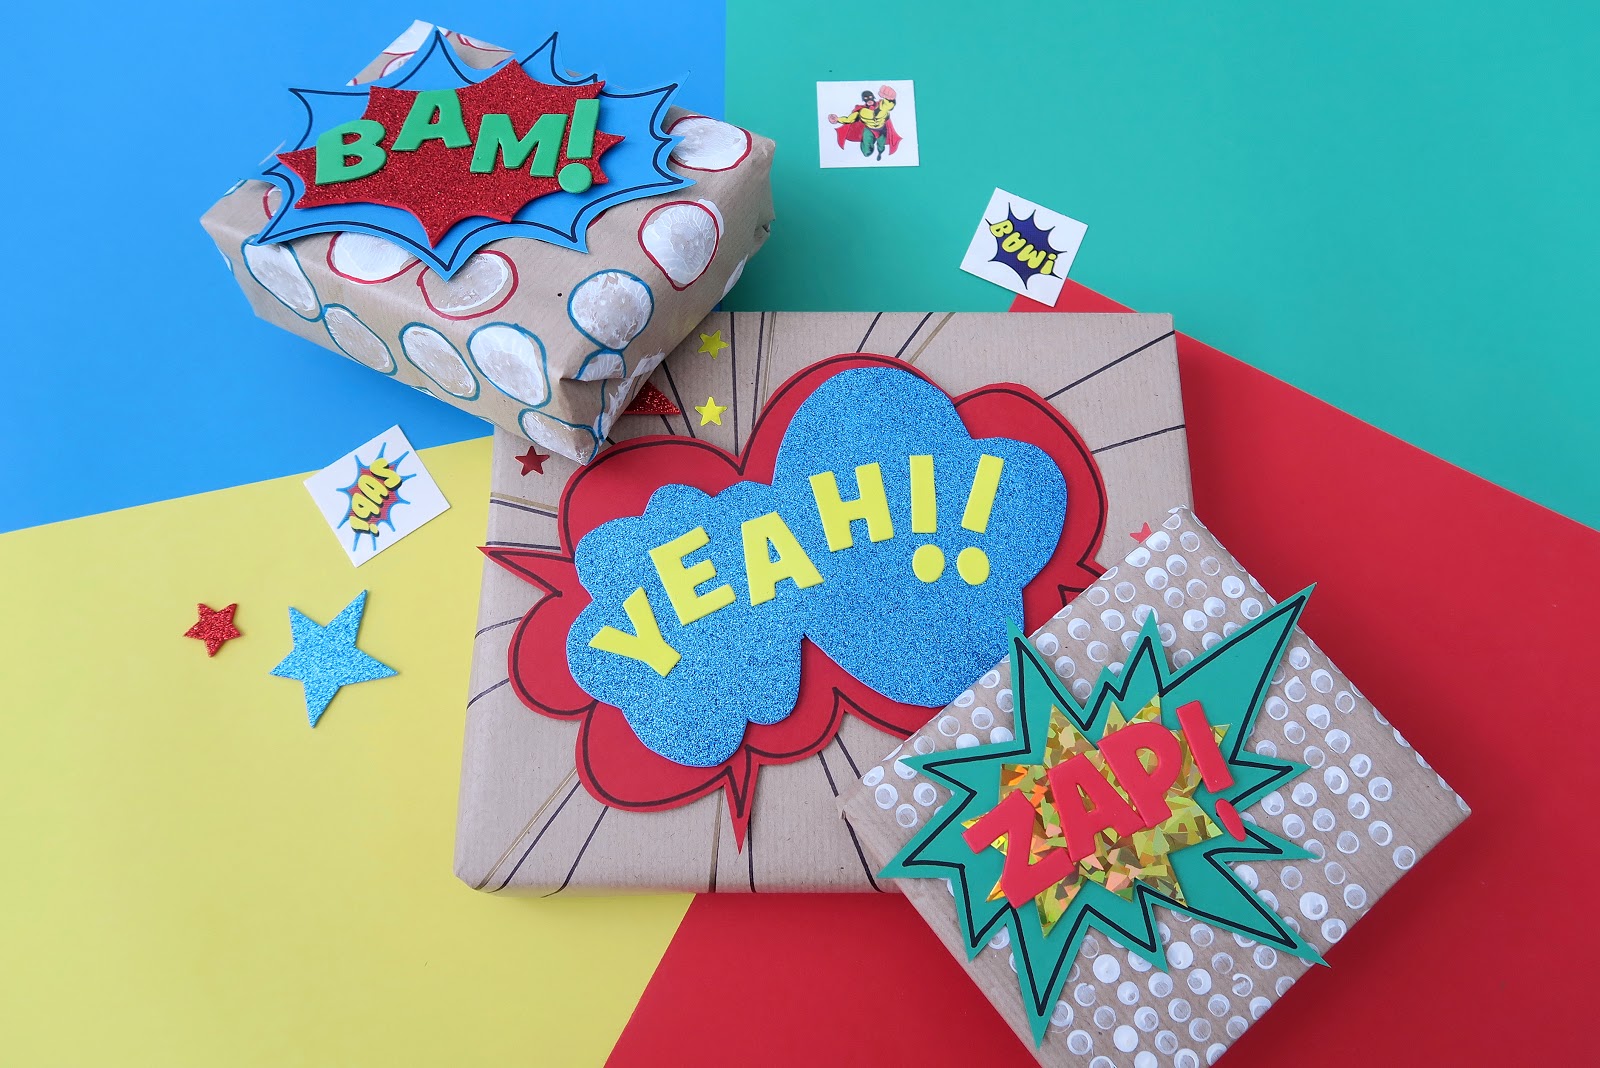
I am delighted to share a bold, more unisex fun gift wrap idea.
Comic book themed - easy,fun, for boys and girls or even man and woman!

Ela has joined in this time and we love the result of our team work.

First, lets have a look at materials for this project!


Stuff we had at home, nothing too fancy ;)


Step 1.

Draw some speech  comic clouds on coloured cards using black thick felt tip pen.
You need to consider the size of gifts you will be wrapping, the clouds can't be bigger then gifts ;)


Next cut them out, leaving the pen outline.


She obviously did not help, always pretending to be so tired :)


Step 2.

Cut out a similar smaller shapes from decorative paper.


Stick it onto bigger clouds using double sided padded tape for extra dimension.


Step 3.
Start on wrapping paper.
The easiest I made it's this one.
The cloud on the last photo its not attached, its there to show the purpose of lines ;)


For the second sheet of paper I use pencil's rubber and acrylic paint to make a dotted background.


For the third and the last Ela use cork to make bigger dots.


I love it when we work together but independently :)


                   The first part of wrapping is that!
                                        Leave it to dry...


I then add some red and blue outlines for the big dots and few gold lines using felt tip pens.
I wrapped the gifts.


Step 4.
Think of some comic book words, pick the right letters and stick it onto clouds.
Here you can get some ideas ;)


Ela had some fun again :)


                                                                YEAH!!


                                    Step 5.
We then stick them onto gifts using only blue tack, the idea was to re purpose it later.
They're simply too nice to throw it away, don't you think?


I cut out few stars...


                                                  BAM!
                                   There you have it!!!


Ela add few little star stickers too.


I wouldn't be myself without making a quick matching card of course :P


                                       Little suggestion of re using ;)


                     I hope you like it as much as we do!
                                   The Birthday boy said
                                                 "WOW"
             which is the best reaction I could wish for :)