Today is Earth Day and we are celebrating!
Read some very interesting facts about it here to find out more ;).
We are trying to be good for our planet Earth through the whole year but today we are shouting loud "Love your Earth!", it's your home.
As a family we're trying not only recycle our rubbish but upcycle and reuse as much as we can, we also riding our bicycles every day with a big joy.
You can have a look again at some of our past projects/ideas, big and small :
- Wind chime
- Play kitchen
- Branch chandelier
- Dolls house
- Kids tent
- Worry dolls
- Reusing packaging
- Made up animals
- Paper scraps cards
And more to come, we have some new ideas for the garden upcycling ;)
Today I am sharing easy, fun and very pretty idea for kids to make with you.
You possibly have seen it or heard of melting old crayons into shapes.
We are showing this to you today so you can pass the good message to you kids about reusing old instead of throwing it away ;)
Lets start!
Materials :
- old/unwanted wax crayons
- silicone baking mould
Step 1.
Choose your crayons, we do Earth's colours but remember you can use this project for any other occasions so the colour palette can be different too ;)
Now the time consuming part - peel them :/
Yes. I know...
Have a cup of coffee and do it :)

I know, its not the purpose :P
Just that ones.
Step 2.
Chop, cut and brake the crayons.
I did it with the small kitchen knife, save the tiny bits for later too ;)
Now get your silicon mould and fill it with the crayon pieces.I got my heart shape mould from here - cheap and cheerful.
The first heart was a trial for me while Ela was at school so I filled just one part of the mould to save some fun for my dear child :)

I filled a half of the actual depth as I planned to make some brooches out of it so we need a light slim version.
Step 3.
Is now time to melt the crayons in the oven.For amount I had 10 minutes in 200 degrees was enough, but ovens might vary so have a look at your melting process.

Ok, so my first reaction to this wasn't happy :/
Where all the colours gone?
It seems to take ages for wax to set so I put the mould to the fridge for another 10 minutes...
I then took it out....

And turn it over...

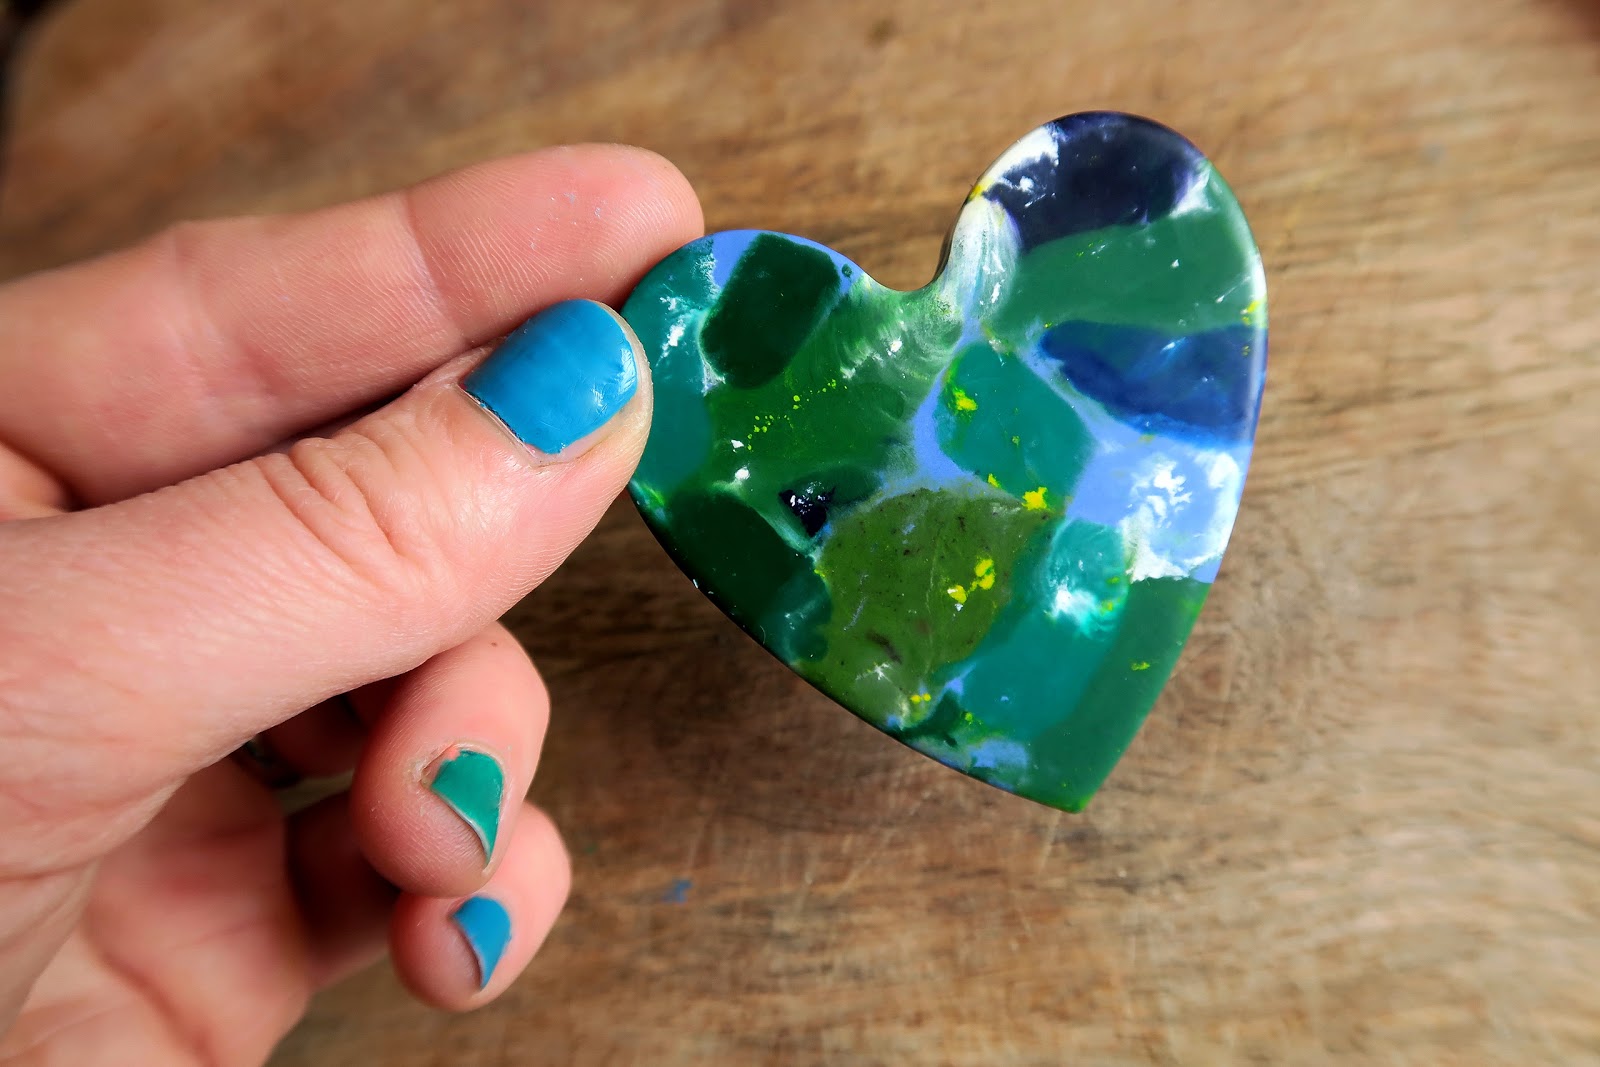
Wow, how pretty is this!
It does look like a mini Earth, only in shape of the heart :)
I was happy like a child, it actually work out great!I could now wait for Ela to make some more together :)
So lets have a look how she did it!

We added some more shades of green, blue and yellow.

She was so into placing each piece of crayon in the right places, here and there...
Then I said they will all melt and mix anyway :)


Ela loved the moment when we were taking them out to reveal the result :)

I then smooth the edges at the back by cutting them off.

I made a few brooches by sticking the brooch pins with a hot glue.

Wax melted and get mixed with the glue so the pin seems to be now strongly attached to the heart.
Why not to hang them somewhere too?Just remember to choose a shady spot ;)

Or just keep them as they are and let your child give it to a friend as a new heart shaped crayon.
Spread the love!

End that's us this morning, we are proudly going to wear our Earth brooches today.

Ela drew a picture too :)

Make some changes,
love your Earth!
love your Earth!


. We are trying to be go...)
Hi,I have nominated you for a Liebester award. Your blog is awesome. Here's a link so you can read what it is all about. I hope you will accept but please don't feel pressured as I know it is a big post to write and life can be busy. Bless you heaps, Demelza http://www.theyearofthedaffodil.com/liebster-award/
ReplyDeleteHi Demelza, thank you so much!
DeleteI had a quick look at your link and it seems to me such a nice idea, much appreciated :)
Still need to read the rules ;)
I shall contact you soon!xxx
Hearts are awesome! :)
ReplyDeleteThank you!!!
DeleteJust a lovley idea :)
ReplyDelete